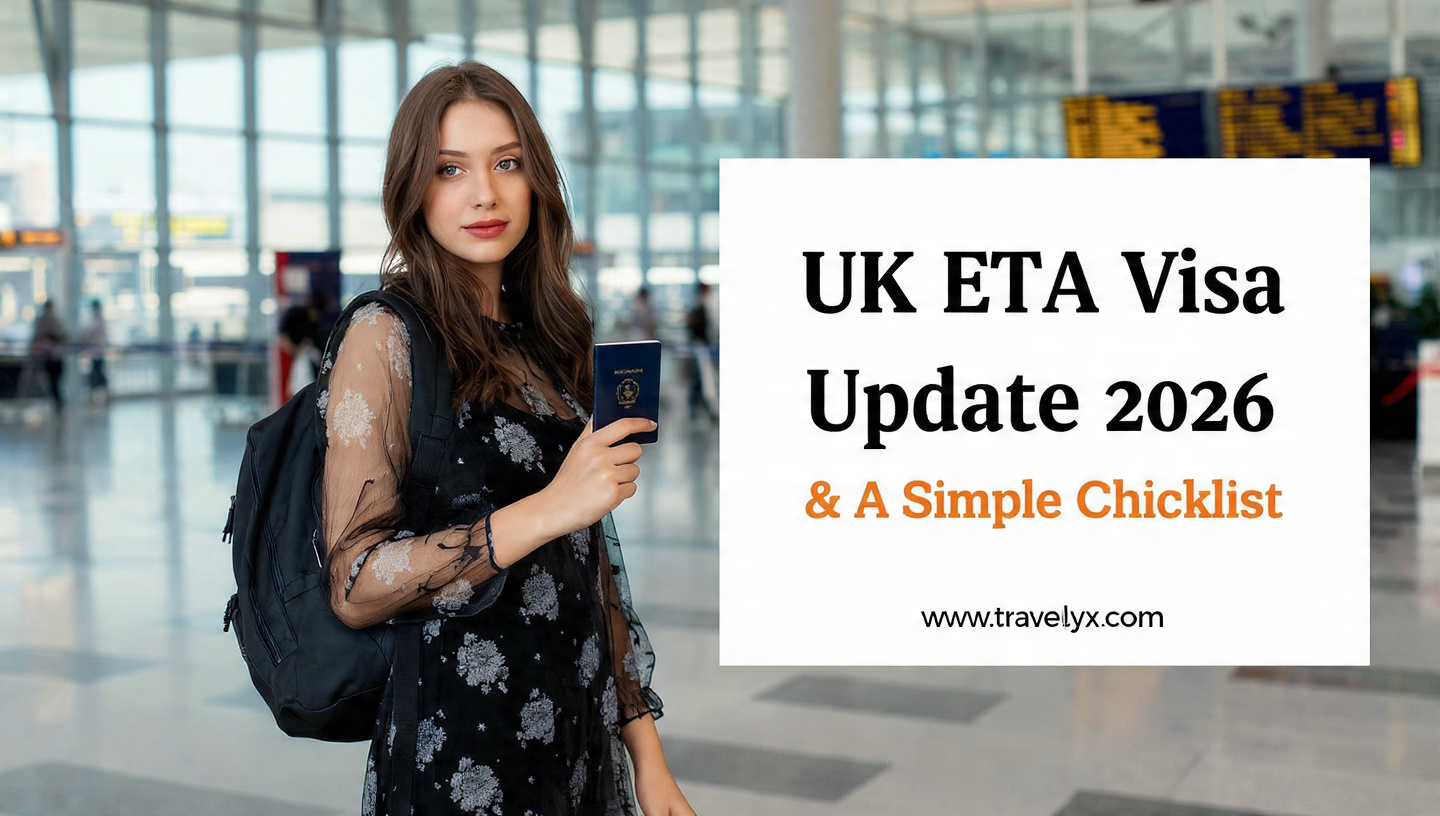
UK ETA Visa update 2026: A Simple Checklist for First-Time & Solo Female Travelers

Picture yourself standing before the iconic Big Ben at sunset, or hiking solo through the misty Scottish Highlands without a single worry about your travel documents. That dream is absolutely achievable, but here’s the catch: before you even board your flight to the UK in 2026, there’s a £16 digital “gatekeeper” you need to befriend first. If you’re planning your first solo adventure to the United Kingdom this year, understanding the UK ETA 2026 Solo Female Travel requirements isn’t just helpful—it’s mandatory. This comprehensive guide breaks down everything you need to know about the UK ETA simple checklist, from the technical steps to solo safety tips that go beyond what most blogs tell you.
The UK Electronic Travel Authorization isn’t like those complicated visa applications that require embassy visits and weeks of waiting. Think of it more like a digital handshake between you and UK immigration—done entirely from your phone, usually approved within minutes, and valid for two whole years. But here’s what makes this guide different from everything else you’ll find online: we’re not just walking through the application process. We’re addressing the real gaps that first-time and solo female travelers face, from what happens when your phone’s NFC chip scanner fails at 2 AM, to why dual citizens need to be extra careful about which passport they use.
February 25, 2026 marked a turning point. That’s when the UK government’s “phased rollout” officially ended, and the ETA became non-negotiable for all visa-exempt nationals. No ETA means no boarding pass, period. Airlines are legally required to verify your status before letting you on the plane, and trust me, you don’t want to find that out at the airport check-in counter.
What is the UK ETA? (And Why It’s Not a Traditional Visa)
Let’s clear up the confusion right away. The UK ETA is not a visa. It’s officially called a “digital permission to travel,” which is a fancy way of saying it’s pre-authorization to enter the UK for visits up to six months. You’re essentially telling UK Border Force, “Hey, I’m coming for tourism, and here’s my background check approval before I even get on the plane.”
Here’s the beautiful part for solo travelers: unlike traditional visas that lock you into specific dates and require you to explain every detail of your itinerary, the ETA gives you flexibility. Got it approved on January 1st but don’t actually travel until July? No problem. Changed your mind and decided to visit Edinburgh instead of London? Totally fine. The ETA doesn’t care about your exact plans—it just cares that you’re eligible to enter.
Traditional Visa vs. UK ETA: The 2026 Reality
| Feature | Traditional Visa | UK ETA (2026) |
|---|---|---|
| Cost | Usually £100+ | £16 |
| Process | In-person/Mailed documents | 100% Mobile/Online |
| Wait Time | Weeks | Minutes to 3 Days |
| Validity | Specific dates | 2 Years (Multiple Entry) |
| Physical Documents | Passport stamps/stickers | Digital only |
The system works because it’s linked directly to your passport number. When you arrive at Heathrow, Gatwick, or any UK port of entry, the border officer scans your passport, and boom—your ETA status pops up on their screen. No paperwork to carry, no separate documents to lose. Your passport IS your ETA proof.
The 2026 Update: What’s Changed Since the Pilot
If you’ve been researching the UK ETA and found conflicting information online, there’s a good reason. The system went through several phases, and 2026 brought some significant changes that caught even seasoned travelers off guard.
- Universal Requirement: All visa-exempt nationals now need an ETA. This includes citizens from the US, EU countries, Australia, Canada, New Zealand, Japan, South Korea, and dozens more. The old “just show up with your passport” days are officially over.
- Price Adjustment: The ETA fee increased from the pilot program’s £10 to the current £16. Still incredibly cheap compared to traditional visas, but worth noting if you’re budgeting for multiple family members.
- The Carrier Liability Rule: This is the game-changer. Airlines, ferry operators, and train companies (yes, even the Eurostar from Paris) are now legally obligated to verify your ETA status before letting you travel. Fail to have a valid ETA, and you won’t even get your boarding pass printed.
That last point is crucial for solo travelers. There’s no sweet-talking your way onto a flight or promising to “sort it out when you land.” The check-in system automatically flags passengers without approved ETAs, and gate agents have zero discretion to override it. I’ve read countless forum posts from travelers who assumed they could apply at the airport—they all missed their flights.
The official UK government ETA page is constantly updated, but here’s what they won’t tell you in bold letters: the “instant approval” you see advertised happens for about 80% of applicants. The other 20%? They go into manual review, which can take up to 72 hours. As a solo female traveler, you’re planning this trip by yourself, so give yourself buffer time.
The Solo Female Traveler’s Checklist: Prep Like a Pro
Okay, let’s talk about the stuff that most generic ETA guides skip entirely. As someone traveling solo, you don’t have a travel companion to bail you out if something goes wrong with your application. You need to be your own tech support, your own backup plan, and your own safety net.
The Tech Essentials: Is Your Phone ETA-Ready?
First things first: your smartphone needs NFC capability. That’s Near Field Communication—the same technology that lets you tap your phone for contactless payments. Why does this matter? The UK ETA app uses NFC to scan the tiny chip embedded in your passport’s bio-data page. This chip contains your photo, fingerprints (if your country includes them), and other biometric data.
iPhone users: If you have iPhone 7 or newer, you’re good to go. Android users: Go to Settings → Connected Devices → Connection Preferences. If you see “NFC” listed, you’re set. No NFC option? You’ll need to use the website version or borrow a friend’s phone for the passport scan portion.
Here’s a frustration I’ve seen in review after review: travelers try to scan their passport through a phone case or in poor lighting. The NFC chip is about the size of a postage stamp, and it’s usually embedded either inside the front cover or behind the bio-page itself. Different countries put them in different spots—US passports hide them in the back cover, while EU passports typically embed them in the bio-page.
Pro tip from the tech-anxiety trenches: If your app keeps saying “Chip Not Found,” try this sequence: Remove your phone case completely. Place your passport flat on a table. Hold your phone parallel to the passport (not at an angle), and slowly glide it across the entire bio-page for about 10-15 seconds. The chip will eventually ping.
Financial Prep: The Proof You Don’t Technically Need (But Might Be Asked For)
Here’s where things get a bit nuanced. The ETA application itself doesn’t require proof of funds, return tickets, or hotel bookings. You just answer suitability questions and pay the £16 fee. However—and this is a big however for solo female travelers—UK Border Force officers at the airport can ask you these questions when you actually arrive.
It’s not common, but it happens more frequently to solo travelers and especially to younger women traveling alone. The officer might ask: “What’s the purpose of your visit?” “Where are you staying?” “How long will you be here?” “Do you have sufficient funds for your trip?”
Carry digital or printed proof of: (1) Your accommodation bookings (even if it’s just the first few nights), (2) A rough itinerary or return ticket confirmation, (3) Bank statements or a credit card showing you can support yourself. You won’t need this 99% of the time, but having it on your phone can turn a potentially stressful 10-minute interrogation into a 30-second friendly chat.
Connectivity: Why an eSIM is Your Secret Weapon
Most ETA guides tell you to “save your approval email.” Great advice, but useless if you land at Heathrow and the airport Wi-Fi is down or painfully slow (which happens more often than the airport admits). As a solo traveler, you don’t have someone else’s phone to hotspot from.
Buy an eSIM before you leave home. Services like Airalo, Holafly, or Nomad offer UK data plans starting at $5 for a week. Install it on your phone while you’re still in your home country, and it activates the moment you land in the UK. This means you can pull up your ETA confirmation email, check your hotel directions, and message family—all before you even clear immigration.
I cannot stress this enough: Having immediate data access in a foreign country as a solo female traveler is about safety, not just convenience. You’re not dependent on finding Wi-Fi to call for help, check a map, or verify that your Uber driver is legitimate.
Step-by-Step: Applying for Your UK ETA Online
Alright, let’s walk through this Apply for UK ETA online 2026 process like we’re sitting together with coffee. The official application is available both as a mobile app and on the GOV.UK website, but trust me—the app is 10 times faster and smoother for first-timers.
Step 1: Download the “UK ETA” App
Go to your App Store (iOS) or Google Play (Android) and search for “UK ETA.” The official app is published by the UK Home Office—make sure you’re downloading the right one, not a third-party app charging you extra fees. The app is free; you only pay the £16 government fee during the application.
Step 2: Scan Your Passport’s Bio-Page
Open the app and select “Apply for myself.” You’ll be prompted to scan your passport. Here’s where good lighting makes all the difference. Don’t do this in dim lighting or with harsh overhead lights creating shadows—the app’s AI gets confused.
- Use natural daylight near a window, or use a well-lit room with soft lighting
- Place your passport on a dark, non-reflective surface (a dark towel works great)
- Hold your phone steady and parallel to the passport—avoid angles or tilting
- If you wear glasses, take them off for this part to avoid screen glare
- Make sure the entire bio-page is visible in the camera frame
The app will auto-capture once it recognizes the passport format. You’ll hear a little camera click sound. If it fails after three attempts, you can manually enter your passport details, but scanning is faster and reduces typos.
Step 3: The “Liveness” Selfie Test
This part trips up a lot of people. The app will ask you to take a selfie to verify you’re a real person (not a bot) and that you match your passport photo. But here’s the solo-friendly challenge: You can’t use makeup filters, you can’t tilt your head at an artistic angle, and you definitely can’t have shadows across your face.
Find a plain, light-colored wall (white or light gray works best). Stand about two feet away from it. Face your phone camera directly, with even lighting on your face—no windows behind you creating a backlight effect. Look straight at the camera with a neutral expression (no big smiles that change your facial features from your passport photo).
The app will analyze your selfie against your passport photo using facial recognition. If you’ve significantly changed your appearance since your passport photo (major haircut, weight change, etc.), this might trigger a manual review. That’s okay—just be honest if the system asks follow-up questions.
Step 4: The Suitability Questions (Answer Honestly)
This section asks about your criminal history, immigration violations, and travel to certain countries. There are about 8-10 questions, and they’re yes/no format. Here’s my advice: Answer truthfully. The UK shares immigration data with dozens of countries, and lying on this form is grounds for immediate ETA denial and potential future visa bans.
Most solo female travelers will answer “No” to all these questions. If you do have a criminal record or previous immigration issues, don’t panic—it doesn’t mean automatic rejection. It just means your application goes to manual review where an actual person evaluates your specific situation.
Step 5: Payment (Apple Pay or Google Pay for Speed)
The final step is paying the £16 fee. You can use a debit card, credit card, Apple Pay, or Google Pay. Here’s a sneaky tip: If you use Apple Pay or Google Pay, the payment processes slightly faster, which can shave a few minutes off your approval time if you’re in a rush.
After payment, you’ll get a 16-digit application reference number. Screenshot this immediately. Email it to yourself. Text it to a trusted family member. This number is your lifeline if anything goes wrong or if you need to check your status later.
Most applications (about 80%) are approved within 5-30 minutes. About 15% take 24-48 hours for routine manual review. About 5% take the full 72 hours because they’re flagged for deeper checks (usually due to unusual travel history or name similarities to watch lists). If you haven’t heard back after 72 hours, use your reference number to contact UKVI support.
Filling the Gap: Troubleshooting Common Tech Failures
Okay, real talk. The UK ETA system is generally smooth, but technology isn’t perfect. Here are the issues that don’t make it into official government guides but show up constantly in traveler forums and app reviews.
Problem 1: “Chip Not Found” Error
You’re doing everything right—phone has NFC, passport is valid—but the app keeps saying it can’t detect the chip. What gives?
Different countries embed passport chips in different locations. US passports hide the chip in the back cover. Most European passports embed it directly behind the bio-page. Some Asian countries place it in the front cover. If you’ve been hovering your phone over the bio-page for a US passport, that’s why it’s failing.
Place your passport flat on a table, bio-page facing up. Start with your phone (case removed!) flat against the bio-page center. If nothing happens after 15 seconds, slowly slide your phone to cover the front cover area. Still nothing? Flip the passport over and try the back cover. The chip will eventually ping. Once you find the “sweet spot,” mark it mentally for future reference.
Problem 2: “Photo Quality Too Low” Rejection
Your selfie keeps getting rejected even though you followed the lighting advice. This usually happens when:
- You’re wearing glasses that create glare (take them off for the selfie)
- Your hair is covering parts of your face (pull it back behind your ears)
- You’re smiling too broadly (neutral expression matches passport photos better)
- There’s a busy background (move to a plain wall)
- Your phone camera lens is dirty (yes, this matters—wipe it!)
Problem 3: Decision Delays Beyond 72 Hours
If you’re past the 3-day mark with no decision, your application is in the “manual review queue.” This isn’t necessarily bad news—it happens when:
- Your name is similar to someone on a watch list (common with names like “Mohammed,” “Wang,” or “Smith”)
- You’ve traveled to certain countries recently (Syria, Iraq, Yemen, etc.)
- Your passport is from a country with high visa fraud rates
- The system detected a minor inconsistency in your application
The fix: Call the UK Visas and Immigration helpline (number on the GOV.UK site) or use the online contact form with your reference number. A caseworker can often fast-track your application once they see you’re a legitimate traveler with a flight booked soon.
Solo Safety in the UK: 2026 Edition
The UK is consistently ranked as one of the safest countries for solo female travelers, but that doesn’t mean you shouldn’t take smart precautions. Let’s talk about safety in a way that’s empowering, not fear-mongering.
Digital Safety: Your ETA Reference Number Strategy
Remember that 16-digit ETA reference number from your application? It’s more than just a tracking code—it’s your proof of authorization if your email mysteriously doesn’t load or your phone dies at the border.
Here’s my recommendation: Create a “Hidden” or “Emergency” album in your phone’s photo app. Screenshot your ETA approval email, your passport bio-page, your travel insurance details, and your emergency contacts. Put all these in that hidden album. iOS users can use the “Hidden” album feature; Android users can create a secure folder.
Why hidden? Because if your phone gets snatched (we’ll talk about that in a second), thieves typically scroll through your visible photos looking for banking apps or sensitive info. They rarely check hidden folders before wiping or reselling the device.
Physical Safety: 999 vs. 111 (Emergency Numbers You Need to Know)
The UK uses different emergency numbers for different situations, and knowing which to call can save you time in a crisis:
- 999 – Police, Fire, Ambulance (life-threatening emergencies only)
- 111 – NHS Non-Emergency Medical Advice (24/7 nurse helpline)
- 101 – Police Non-Emergency (for reporting crimes that aren’t in progress)
As a solo female traveler, here’s when to use which: Feeling unwell, need a pharmacy recommendation, or worried about a minor health issue? Call 111. Someone following you, feeling threatened, or witnessed a crime in progress? Call 999. Found your Airbnb broken into hours later or need to report a stolen purse? Call 101.
The 2026 Phone-Snatching Awareness (London & Manchester Reality)
Here’s a trend that’s exploded in 2025-2026 and continues into this year: phone snatching on mopeds in major UK cities, particularly London and Manchester. Thieves on electric scooters or bikes target pedestrians who are walking while looking at their phones for navigation.
They’re incredibly fast—you’re checking Google Maps on the sidewalk, and before you process what’s happening, someone’s zoomed past and grabbed your phone from your hand. By the time you react, they’re three blocks away.
- Never walk on busy streets with your phone in your hand—use headphones with voice navigation instead
- If you must check your map, step inside a shop doorway or put your back against a building
- Use a phone strap or crossbody phone case when you’re out (tourist areas sell them everywhere)
- Download offline maps before you leave your accommodation so you’re not constantly pulling out your phone
- In crowded areas like Oxford Street or Piccadilly Circus, keep your phone in a secure front pocket or crossbody bag
This isn’t about being paranoid—it’s about being aware. The vast majority of your UK trip will be perfectly safe. I just want you to have the same street smarts that locals have developed.
Safe Transport: Late-Night Travel Tips for Solo Women
Public transport in the UK is generally very safe, but solo female travelers often ask about late-night travel. Here’s the insider knowledge:
On Buses: Sit near the driver, especially on night buses. London’s night bus network is excellent, and drivers are trained to watch out for passenger safety. If someone makes you uncomfortable, signal the driver or get off at a well-lit stop.
On Trains: Look for the “Guard’s Carriage” or sit in carriages near other people. Avoid empty carriages late at night. Most UK trains have emergency buttons in every carriage—they’re the red buttons near the doors. Pressing one alerts the conductor immediately.
The Tube (London Underground): After 10 PM, use the “Night Tube” lines (Victoria, Central, Jubilee, Northern, and Piccadilly lines run all night on weekends). Stay in the middle carriages rather than the very front or back, and stand near other passengers while waiting on the platform.
- Citymapper: Better than Google Maps for UK public transport—shows which train cars to board for easiest station exits and includes real-time safety updates
- WalkSafe: Creates the safest walking route based on street lighting and pedestrian traffic
- bSafe: Lets you share your location with emergency contacts and has a fake call feature if you need an excuse to leave a situation
The 2026 UK Travel Realities: Contactless Everything
Here’s something that surprises a lot of international visitors: the UK has become almost entirely contactless in 2026. We’re talking about a level of cashless society that makes even Nordic countries jealous.
Your Phone IS Your Travel Card
You don’t need to buy Oyster cards, paper tickets, or any physical travel cards in London anymore. Just tap your phone, smartwatch, or contactless credit card at the Tube gates, bus readers, and train barriers. The system automatically calculates your daily cap (the maximum you’ll pay per day regardless of how many trips you take).
For solo female travelers, this is actually a safety feature. You’re not fumbling for cash or tickets in crowded stations—just tap and go. Less time standing still means less opportunity for pickpockets or unwanted attention.
Use Apple Pay or Google Pay linked to your credit card rather than tapping your physical card. Why? If your phone gets stolen, you can immediately lock Apple/Google Pay remotely. If your physical card gets stolen, you have to wait for a replacement to be shipped internationally. Phone payments give you instant control.
The Pub Culture: Solo Dining Without Judgment
Americans and solo travelers from other cultures often feel weird about eating alone in restaurants. The UK has a beautiful solution: pub culture. British pubs are community hubs where solo dining is completely normal and judgment-free.
As a solo female traveler, pubs are actually safer and more welcoming than many formal restaurants. Most serve excellent food (we’re talking proper fish and chips, Sunday roasts, and gastropub fare—not just bar snacks). Look for “Family Friendly” signs if you want a calmer atmosphere, or ask for “the quietest area” when you enter.
Pro tip: Order at the bar, grab a table, and they’ll bring your food out. It’s not waitstaff service in most pubs, which means you control the pace of your meal and don’t feel rushed. Bring a book, journal, or just enjoy people-watching. Nobody will bother you.
FAQ: The Questions Solo Travelers Are Really Asking
This is critical: If you hold British citizenship, you MUST use your British passport to enter the UK, regardless of what other passports you hold. You cannot apply for or use an ETA as a British citizen. The 2026 rules specifically state that airlines can deny boarding to dual British citizens who try to travel on their non-British passport with an ETA.
Here’s why this matters for solo travelers: If you applied for an ETA using your US passport (for example), but you’re also a British citizen, the system will eventually flag this during your application or at the border. You won’t be denied entry to the UK (you’re a citizen!), but you might miss your flight or face delays while they sort it out. Always use your British passport if you have one.
Great question, and the answer is nuanced. The UK and Ireland are part of the “Common Travel Area” (CTA), which has special border arrangements. However, a UK ETA does NOT give you automatic entry to the Republic of Ireland. Ireland has its own visa policies.
Northern Ireland, on the other hand, is part of the United Kingdom, so your UK ETA covers you there. You can fly into Belfast or cross from mainland Britain to Northern Ireland without any additional authorization.
If you want to visit Dublin or other parts of the Republic of Ireland, check Ireland’s visa requirements separately. Many nationalities that are visa-exempt for the UK are also visa-exempt for Ireland, but they’re independent systems. You can find details on the Irish Immigration Service website.
Yes, you can apply, but here’s the catch: Your ETA is electronically linked to your specific passport number. If you get a new passport before your trip, your ETA won’t transfer—you’ll need to apply again with the new passport.
The ETA itself is valid for 2 years or until your passport expires, whichever comes first. So if your passport expires in 8 months, your ETA will also expire in 8 months, even though ETAs are normally valid for 2 years.
My advice for solo travelers: If your passport is expiring within a year of your planned trip, just renew it first, then apply for the ETA with your new passport. It saves you the hassle and the extra £16 fee for a second application.
Unfortunately, no. There’s no “edit” function once you’ve submitted your application. If you notice a minor typo (like a middle name spelling), it might not matter—the system primarily matches your passport number, photo, and bio details.
However, if you entered your passport number incorrectly, your date of birth is wrong, or your name is significantly misspelled, you’ll need to submit a new application with the correct information. You’ll have to pay the £16 fee again, which is frustrating but unavoidable.
The lesson: Triple-check everything before hitting “Submit,” especially your passport number and birth date. Take your time. The extra two minutes of verification can save you £16 and potential border issues.
Digital is fine. Your ETA is linked to your passport electronically, so when the airline scans your passport at check-in, your ETA status automatically appears in their system. Same at UK Border Force—they scan your passport, and your ETA pops up.
That said, I recommend having a screenshot or PDF of your approval email on your phone for peace of mind. Not because you’ll be asked for it (you probably won’t), but because technology occasionally glitches. If there’s a system issue, having your 16-digit reference number handy can help airline staff or border officers look you up manually.
Absolutely. The UK ETA app allows you to apply for multiple people in one session. You’ll need each person’s passport for the scanning step, but you can pay all the fees together (£16 per person).
For solo travelers, this is relevant if you’re coordinating travel with friends or if you’re meeting family in the UK. Just make sure each person has their own passport with them when they travel—the ETA is individually linked to each passport number.
Connecting Your UK Journey: Beyond London
While the ETA gets you into the UK, your adventure doesn’t have to stop at London’s city limits. The UK is a treasure trove of experiences that solo female travelers absolutely love.
If you’re drawn to nature and hiking, check out our guide on solo hiking in the Lake District UK without a car. The Lake District is one of the most accessible national parks for solo travelers using public transport, and it’s stunningly beautiful—think emerald valleys, mirror-like lakes, and trails ranging from gentle walks to challenging climbs.
For those seeking off-the-beaten-path destinations, our article on 10 women-friendly hidden gems in the UK covers charming villages, coastal towns, and cultural spots that don’t make it into typical tourist guides but offer incredible solo travel experiences. These places are perfect for travelers who want authentic British culture without the crowds.
Top 3 Solo Safety Tips for the UK (2026 Quick Reference)
- Use Citymapper Over Google Maps: Citymapper is specifically designed for UK public transport and includes real-time safety alerts, accessibility info, and the fastest routes. It tells you which train car to board for the quickest station exits, which can be a game-changer when you’re navigating unfamiliar stations late at night. Google Maps is fine for general navigation, but Citymapper is UK-optimized.
- Contactless is King (Your Phone IS Your Ticket): Forget buying paper tickets or Oyster cards. Just tap your phone, smartwatch, or contactless bank card on any bus, Tube gate, or train barrier. The system automatically caps your daily spending, so you’ll never overpay. For solo travelers, this means less time fumbling with cash or tickets in crowded stations, reducing your vulnerability to pickpockets or simply getting flustered.
- The “Pub” Culture is Your Friend: British pubs aren’t just bars—they’re community dining spaces where solo female travelers can eat excellent food without any judgment. Look for “Family Friendly” signs if you want a quieter atmosphere. Order at the bar, grab a seat, and enjoy your meal at your own pace. It’s completely normal to dine alone at a pub, and you’ll often strike up friendly conversations with locals who can give you insider tips on what to see nearby.
The “3-Day Rule” and Application Timing Strategy
The official UK government advice is to apply “at least 3 days before your flight.” But here’s the reality that the official pages don’t emphasize enough: while most ETAs are approved within minutes, some take the full 72 hours for manual review.
As a solo traveler, you don’t want to be frantically refreshing your email 24 hours before your flight, wondering if your ETA will come through. My recommendation based on real traveler experiences? Apply at least one week before your departure if possible.
- 7-10 Days Before Departure: Perfect timing. Gives you buffer time if you need to reapply due to an error or if your application hits manual review.
- 3-6 Days Before: Still okay, but you’re cutting it closer than comfortable. This is the minimum recommended window.
- 48-72 Hours Before: Risky. If your application goes into manual review, you might be making frantic phone calls to expedite it.
- Less than 48 Hours: Only do this in emergencies (last-minute trip, urgent travel). You’re basically gambling that you’ll be in the 80% who get instant approval.
The £16 fee is non-refundable, so even if you apply early and then have to cancel your trip, you’re only out sixteen pounds. It’s worth the peace of mind to apply with plenty of buffer time.
What Happens at the UK Border: The ETA Experience
Let’s walk through what actually happens when you land in the UK with your approved ETA. This is something that freaks out first-time travelers, so let me demystify it.
Step 1: Follow “All Other Passports” Signs – When you get off your plane and head toward immigration, you’ll see signs for “UK/EU Passports” and “All Other Passports.” As an ETA holder (not a visa), you follow the “All Other Passports” queue. Don’t worry—this line moves much faster than it used to because the ETA system has streamlined everything.
Step 2: Use e-Gates If Available – Many major UK airports now have e-gates for ETA holders from certain countries (US, Canada, Australia, New Zealand, Japan, South Korea, and some others). These are the automated gates where you scan your own passport, look at the camera for facial recognition, and walk through if approved. It takes about 30 seconds total. If you’re eligible for e-gates, use them—they’re incredibly fast.
Step 3: Traditional Border Officer Check – If e-gates aren’t available or you’re not eligible, you’ll go through the traditional border officer desk. The officer will:
- Scan your passport (which automatically pulls up your ETA approval)
- Possibly ask you a few quick questions: “What’s the purpose of your visit?” (Answer: “Tourism/vacation”), “How long will you stay?” (Be honest), “Where are you staying?” (Name your hotel or first Airbnb)
- Stamp your passport (though many UK airports have moved to digital entry logs without physical stamps)
- Say “Welcome to the UK” and wave you through
The entire interaction typically takes 2-3 minutes max. Border officers are looking for people who seem nervous, evasive, or whose travel story doesn’t add up. As a solo female traveler with a legitimate ETA, hotel bookings, and a reasonable purpose for your visit, you’ll breeze through.
Conclusion: Your Journey Starts with a Click (And Ends with Incredible Memories)
The UK ETA might seem like just another bureaucratic hoop to jump through, but think of it as your digital handshake with one of the world’s most welcoming countries for solo female travelers. For £16 and about 10 minutes of your time, you’re unlocking two years of visa-free access to a nation that offers everything from world-class museums and theaters to wild coastal walks and charming village pubs.
Yes, the technology can be finicky sometimes. The NFC chip scanning might take a few tries, and the selfie requirements feel a bit silly when you’re standing in your kitchen trying to get the lighting just right. But once you’re on that plane, watching the British countryside unfold beneath you as you descend into Heathrow or Edinburgh, all those minor tech frustrations will feel like distant memories.
The UK in 2026 is safer than ever for solo women travelers, more accessible thanks to contactless technology, and filled with hidden gems that go way beyond the typical London Eye tourist traps. Your ETA is just the first step—the journey itself is where the magic happens.
So download that app, charge your phone, find good lighting for your selfie, and get that ETA approved. The UK is waiting for you, and trust me, it’s going to be absolutely brilliant.
- ✓ UK ETA approved and confirmation email saved
- ✓ 16-digit reference number screenshotted and backed up
- ✓ eSIM purchased and installed for instant UK connectivity
- ✓ Citymapper app downloaded with offline London map
- ✓ Emergency contacts shared with family/friends
- ✓ Accommodation bookings saved offline (just in case)
- ✓ Phone set up for contactless payments (Apple Pay/Google Pay)
- ✓ Travel insurance purchased and docs saved
Safe travels, and enjoy every moment of your solo UK adventure. You’ve got this! 🇬🇧